Category Archives: DIY

Hidden crafty gems around Melbourne

Standard

This week my work has been really hectic so instead of completing a craft project I thought it would be fun to share other people’s craft delights. On my travels around Melbourne I’ve come across all sorts of weird and wonderful street art but recently there has been an influx of knitted ‘tree cosies’. I particularly love this crocheted gum tree located on Swanston Street, Melbourne. The translucent bark against the pale blue crochet is really beautiful. Another cool idea (as I’m sure you’ve seen) are knitted and crocheted bike racks. This one is in Northcote, Melbourne.

                               Crochet gumtree    tree cozy   Northcote bike racks

The best ‘needlework of art’ so far has to be this knitted and crocheted bicycle located in a knitting shop on Collins St, Melbourne. Every inch is embellished (from wheels to handlebars!) in crochet and knitting. My favourite part is the fabulously quirky fox head seat. How absolutely wonderful!

IMG_2832  IMG_2836  IMG_2837  IMG_2834

Another completely unrelated crafty delight I’m embracing is this draught excluder log craft project using tree bark fabric. This sweet idea is taken from a craft magazine my best friend sent me from the UK called ‘Molly Makes’.

          Log draught excluder   IMG_2842   IMG_2839   Quilled flower

Lastly, this kingfisher made entirely out of paper quills caught my eye. The art of quilling involves coiling narrow paper strips to create a design. Quills can really bring a handmade card to life. I’m sure you’ll agree this 3D kingfisher is pretty impressive.
Quilling materials are easily transportable so it’s another great craft you can do on your lunch break. Here’s a website with a great tutorial on creating quilled handmade cards.

Kingfisher is displayed in building 94, RMIT University, Melbourne.
Quilled card from ‘Inna’s Creations’ website

How to make a beaded crochet necklace!

Standard

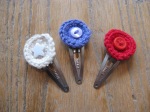
I must confess I’m new to crochet. I signed up for a beginners class in June and I’m really excited to finally learn. My best friend makes these amazing crochet hair clips with a cute button in the centre.
Crochet hairclips  IMG_2872  IMG_2883  IMG_2884
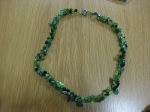
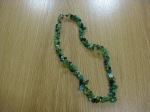
A unique alternative to wool crochet is to use jewellery wire and beading to create this fabulous crocheted necklace! Ideal as a present or as a gift to yourself, it couldn’t be easier to make!

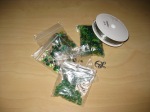
You will need: wire, beads, clasp, jewellery pliars

Here’s how:

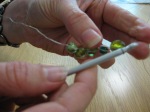
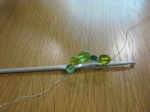
  • Crochet 3 strands of beads onto thin wire using a chain stitch (I used a 4mm crochet hook)
  • See YouTube video below on how to chain stitch using jewellery wire
  • Remember to leave a tail at the end to attach the clasp!
  • After each chain stitch thread a bead onto the wire until you have 3 chain stitched bead strands
  • Intertwine all 3 strands together
  • Attach the jewellery clasp


The finished product:

IMG_2879  IMG_2875

While we’re on the subject of crochet, I just had to share these amazing crochet ‘shell suits’ for tortoises! Designed and made by Katie Bradley, who initially made them as a family joke but they became so popular she opened an Etsy tortoise shop. I’m sure you’ll agree, they are absolutely adorable!

How to make simple hair accessories!

Standard

Hello lovely friends!

I’ve been really busy at work so haven’t had much time to devote to craftiness! I did make these simple hair clips using scraps of floral material I had in the house. The wonderful thing about altering vintage (or new) dresses is that you usually have leftover fabric to make cute matching accessories! What better use for fabric odds and ends?

IMG_2863  IMG_2889b  IMG_2890  IMG_2891

I’ve used metal self-cover buttons but you can use plastic ones too.

Here’s how:

  • Cut out a circle of pretty fabric larger than the button size and sew a gathering stitch close to the fabric edge
  • Position the button top onto the wrong side of the fabric
  • Tie the ends together and pull the fabric until it gathers around the button
    Tip: I use spray mount glue to attach the fabric to the metal for slippery fabrics
  • Position the back onto the front, make sure the gathered fabric on the edge of the button is smooth with no tucks (unlike mine!) and snap it closed
  • Attach a hair clip or bobble (piece of elastic) to the back of the button and hey presto you have a new hair accessory!

Covered buttons make lovely gifts and can be used for card making too!

IMG_2867    IMG_2865

Next week I’m going to make a beaded crochet necklace on my lunch break.

Simple hand made card ideas!

Standard

I’ve been making hand made cards for as long as I can remember. Receiving a hand made card is so personal! These cards are suitable for all occasions but perfect for Australian Mother’s day- this Sunday 12th May.

IMG_2846IMG_2844IMG_2847Pretty buttons

Making your own cards doesn’t have to be time consuming. I made some of these ones on my lunch break!

I tend to stick to this simple design:

  • Cut the cards out on a large sheet of cardboard
  • Stick layers of corrugated card, material or fancy paper to the card using spray mount glue (you can use craft glue but I prefer adhesive spray, it’s much stickier!)
  • Sew an accessory of your choice to the fabric; a vintage style button usually works well. Or you can sew on a ribbon for a simple, attractive shabby chic design
  • Using craft scissors decorate the inside of your card. There’s no reason for cards to be plain inside!
  • Lastly stamp the back of your cards with your favourite stamp. Mine is, you guessed it- a toadstool!

IMG_2854      IMG_2857     Elephant card

Alternatively – buy your own!
If you don’t have time to make your own cards shop bought ones can be gorgeous too but even better than that you can support an artist by purchasing their designs. Check out these sweet floral ones by Rifle Paper Company available in a variety of different categories including dogs, love and holidays!

Also these ones by Red Cap Cards are made by a variety of different artists and are truly unique.

Happy shopping or making!

Next week on my lunch break at work I’m going to make simple hair accessories.